AAR: CQB Tactics Training with a Former “Tier 1” Operator, hosted by AirsoftExtreme

AAR: CQB Tactics Training with a Former “Tier 1” Operator, hosted by AirsoftExtreme
Location : TASK Enforcement CQB Training Facility
Event date : 6/24/2012

07aar1man05xsm.jpg

LOGISTICS
Instructor : AEX has hosted countless airsoft events over the years but this, to my knowledge, is the first ever training type event they’ve hosted in which an instructor with real world combat experience has been brought in to teach tactics to civilians and airsofters. This course was designed to give airsofters an introduction to how current real world CQB tactics are executed by the military elite. The subject matter expert, Tyler Grey, is a highly reputable Former Tier 1 Operator who’s unit was specifically tasked with Direct Action Missions and has multiple military tours under his belt. Recently retired from the service due to combat injuries, his extreme familiarity with present day tactics and SOPs for CQB engagements make him an exceptional source of information.

Location Info : The course was held at TASK Enforcement, a CQB Training Facility located in Southern California used extensively by various branches of law enforcement. The facility has a wide variety of perks including the ability to adjust the light levels from bright indoor lighting all the way down to no-light. While setup for UTMs and SIMs, airsoft is frequently used as a cost effective alternative for training. Other features of the facility include an extensive catwalk system for instructors to observe the trainees, stairwells, various room and hallway configurations, a pro-shop, locker room, and CCTV throughout the training area for people to watch the action go down live from the lecture room or to be recorded and reviewed at a later time. This isn’t a cheap make shift CQB field made out of rickety plywood walls and gasoline drums. Walls and doors at TASK are solid. For an extra fee, the facility can provide fully functional doors and windows specifically for mechanical breaching training. Access to a location like this is rare for anyone, let alone airsofters.

Students : Awareness of this upcoming event was disseminated through Airsoft Extreme’s Facebook page, company newsletter and in my case: word of mouth. As such, the only people who knew about it were mostly airsofters and acquaintances of the store. An age requirement of 18 and over was imposed, and the class size was capped at 25 students. The student demographic comprised of 10 guys from my own team (aged 25 to 40+, a mix of LE, former military, and civilian live fire shooting enthusiasts). The remainder of the students covered a wide range of ages and backgrounds.

Gear : Since this was an event specifically geared towards airsofters, the assumption was that students would be bringing their own guns, ammo and kit, although all of that would be available for rent in future courses which will be opened up to non-airsoft specific students. The only requirements imposed by the facility and AEX was full seal ANSI rated eye protection (full face protection was strongly recommended since the course would have close engagements and a two way range). Having taken non-airsoft live fire tactics courses from Tyler in the past, I was aware that his preference for student gear to be as military-ish as possible. This CQB class would be a little looser in that regard as airsofters tend to use whatever they want, or as it is in many cases whatever they have. When asked, I simply instructed my guys to wear BDUs or non-BDUs, but to definitely bring their milsim kit. The reason for this being you want to train as you fight (or in some cases: train as you play). Beyond our group, we saw a lot of variety in guns, gear, clothing, etc. Some people brought rifles (generally some type of AR15, both GBB and AEG), while a smaller minority had submachine guns and one or two shotguns. Not everyone had a side arm, but most did.

Cost : The course fees were $125. This covered course fees, facility use and clean up after the course by the AEX staff. Equipment such as guns, ammo, and gear were to be the user’s responsibility to source. I know for many airsofters, the expense of $125 for the class might seem high. For me it felt very reasonable since I regularly take live fire classes from various firearms instructors that cost double to quadruple that amount. Such is the norm in the firearms training world. Training in the airsoft world however is not common, and since airsofters as a whole cover a wide range of ages and financial dispositions, individuals both capable and willing to pay for training is a very small subset within this community. $125 was in my mind a bargain to receive instruction from a true Tier 1 operator in a subject not often covered by most schools.

THE COURSE
The first thing that was clear about this class was that it was purely about tactics and technique. Marksmanship fundamentals and weapon’s manipulation was not addressed. There simply wasn’t time for it and it is a course (several in fact) onto itself. No, this class was all about the current military tactics of how to enter and clear a room of potential threats using anywhere from 1 or more shooters in a fire team (military tactics, not LE tactics which has a different set of SOPs). The military tactics that were taught to SF a decade ago has since evolved a great deal and is significantly different than what is taught today. Whatever your stance is on the war in the middle east, it has taught us valuable life lessons (hard earned in many cases) on many subjects, one of which is tactics for both urban and non-urban war fighting. This course is designed to introduce an intermediate to advanced level shooter to the fundamentals of CQB and how to pull it off using team tactics. It’s not about mimicking what the professionals do, but understanding why they do it, how they do it, and executing it precisely to increase your chances of success and survival.

The majority of students were on site by 0800. We had around 35-45 minutes to get our kit squared away and prepped for the day. This includes loading mags, setting up gear, guns, etc. Just before 0900, we gathered in the facility’s lecture theater at which point Tyler introduced himself and started giving some insight into the history of CQB, how it came about, and how it has evolved.

Instruction overview:
Class room instruction was lengthy, chock full of information and covered the following topics:
– Primary focus of CQB
– Keys to success in CQB: Speed, Surprise, and Violence of Action. Breaking the will of the enemy to fight.
– Weapon positions in CQB: high ready vs low ready vs muzzle level. When to use which position.
– Basic entry techniques explained in depth:
Technique #1 – Strong walling
Technique #2 – Alternating
– For either technique you need to create fire superiority over the opposition.
– Shoot, move and communicate.
– First man in is always correct. Just flow with it
– The fatal funnel
– Points of domination and how deep each shooter penetrates into the room
– Areas of responsibility, Sectors of fire and tunnel vision
– How to deal with “Dead Space” (unknown areas or blind spots not visible during entry)
– Short rooms vs long rooms
– Stacking vs not stacking
– Nuts to butts
– SMGs vs Shotguns vs Rifles
– When to transition to a secondary vs emergency and tactical reloads
– Shooting on your dominant vs non-dominant side
– Flashbangs
– In real world scenarios, Plate Carriers won’t cut it in CQB. You want to be armored to the gills
– Breaching: door kicking vs explosive breaching, ballistic breaching and mechanical breaching
(note: if you’re door kicking you might as well knock on the door and let the OPFOR know you’re coming in).
– If you don’t have an immediate task or responsibility, you’re pulling security
– What do you do when someone goes down
– Training for only specific roles within the stack vs training for any and all roles in the stack

Tyler Grey, morning lecture room instruction:
01aar01xsm.jpg 01aar02xsm.jpg 01aar03xsm.jpg

While strong walling (all operators enter the room and adhere to a singular wall, weapons pointed down range) is still a technique used by some branches of the military, the unit this Tier 1 operator trained with preferred Alternating Entry (whichever direction the 1st guy goes (left or right upon entry), next guy goes in the opposite direction and this alternates for each subsequent entry person). I was relatively familiar with both techniques but there was a lot of nuances and strict rules that needed to be followed. Things like responsibility of each person in the room, their individual focus, sectors of fire, points of dominance, where people needed to be, and the speed at which you moved. Given time and experience, some of those rules can be bent, however, the core principles of the technique must be understood in order to execute a more dynamic approach later (translation: get the basics down perfectly before you try to modify it).

After explaining these techniques and principles in the lecture theater both verbally and using the white board for visual diagrams, it was time to apply what we had learned in a practical setting.

Prep:
01aar04xsm.jpg 02aarprep01xsm.jpg 02aarprep02xsm.jpg

Tyler doing a quick demo:
04aartylerdemoingxsm.jpg

The majority of the instruction was specifically focused on 4 Man Team Entry using the alternating technique into a corner fed room. The class was broken down into pairs, and we were first taught the roles of the 1st man and 2nd man room entry procedure (ignoring the roles of the 3rd and 4th man for now). Tyler would explain and demonstrate the technique, and then he’d observe from above on the catwalk. After each drill we would frequently switch roles within those pairs so that both shooters were familiar with the movements and responsibility of each position. We eventually had each pair combine with a second pair to form a four man team. We then practiced 4 man room entry, alternating the roles within the team after every drill to allow strong understanding and familiarity for each person’s positions in the room, responsibilities, sectors of fire, speed in movement, etc.

Running drills in pairs:
03aar2manstack01xsm.jpg 03aar2manstack02xsm.jpg 06aarpairsxsm.jpg

Moving onto 4 man room entry, we practiced changing up the roles in the stack:
03aar4manstack03xsm.jpg 03aar4manstack01xsm.jpg 03aar4manstack02xsm.jpg

Tyler observing students’ movements (guns cold) and giving feedback:
08aarinstruction03xsm.jpg

Some of the teams running through the 4 man drills:
05aar4man04xsm.jpg 05aar4man03xsm.jpg
05aar4man02xsm.jpg05aar4man01xsm.jpg

The majority of the class was conducted against IDPA/IPSC targets. Granted the paper targets weren’t shooting back at us, and while the placement of the targets might have seemed random to some, it was in fact strategic and there was clear lessons to be learned by each shooter in the room. Some targets were out of the line of sight for some shooters, meanwhile other targets might have been within the peripheral vision of a shooter but weren’t the responsibility of the shooter. It’s tough entering a room and seeing a possible target in the corner of your eye, knowing you’re not supposed to engage it as it was someone else’s responsibility and you need to just focus on what you’re tasked with. It’s one of the few cases in a class in which I’ve actually been told to start the drill with a certain degree of tunnel vision before allowing myself to expand that focus. As we quickly learned, getting sucked into the fire fight that you can see and neglecting your personal areas of responsibility can lead to your entire team getting killed.

Once the group as a whole showed a strong understanding of the fundamentals, we transitioned to shooting against live opposition. The ground rules were simple: since this is training for technique and movement, the entry team were immortal during the drill while the OPFOR could be taken out after one or two shots. These drills weren’t supposed to be mini-games, but a learning experience. While we were “immortal” for the duration of the drills, we still kept track of the number of hits we received and locations on our persons as to where we were hit. Switching from shooting at paper to shooting live OPFOR who were actively trying to shoot back at us, it was surprising how many people forgot the freshly learned techniques we had just gone over minutes before and lost sight of their specific roles and responsibilities. It was a great reminder that, you need to practice practice practice until the technique becomes second nature. As the first and second entry men, you need to be able to circumvent your natural inclination to focus on just the threats that you see and follow through on the hidden threats that may also exist.

Students running through the drills:
07aar1man08xsm.jpg 07aar1man10xsm.jpg 07aar1man09xsm.jpg
07aar1man04xsm.jpg 07aar1man03xsm.jpg 07aar1man02xsm.jpg
07aar1man06xsm.jpg 07aar1man07xsm.jpg 07aar1man01xsm.jpg

Discussing other pertinent topics:
08aarinstruction02xsm.jpg 08aarinstruction01xsm.jpg

Reviewing the day’s content and lessons learned:
02aarprep03xsm.jpg

The topic of single man room clears was touched on. The basic gist was that that was a worst case scenario, and in those cases if you absolutely must enter the room on your own you need to use various pie-ing techniques, and eliminate the OPFOR in the manner in which it’d maximize your survivability. This class however was specifically focused on team tactics and single man clears wasn’t discussed in depth.

Other topics covered briefly, was a brief explanation of more advanced techniques such as stairwells, hallways, t-junctions, snapping corners, etc. Many of those were bigger subjects than the time we had allowed but would be covered in future classes.

STUDENT FEEDBACK:
My Personal Input:
• More emphasis needed on safe weapon handling. My guys and I observed a lot of unsafe weapon handling in some of the students. Everything from flagging other people during down time between drills to flagging each other during drills. The opinion of my group was that more emphasis needs to be placed first thing in the morning (and consistently throughout the day when the same offenses were made) for firearm safety. Even during a simple airsoft game, it’s a little unsettling to see a group of guys stacking up on the door and half of them have their guns in each others backs. Some flagging may be unavoidable (and it does happen occasionally with real world operators), but the instances which can be avoided, should be. Constant awareness of your gun should always take precedence. Suggestions to this would be going over the firearm safety rules via a quick brief in the AM, repeated again after lunch, and reminders each time someone makes a mistake. In live fire training, everyone on the line (including students) is an RSO (range safety officer). When anyone observes unsafe behavior, it needs to be called out for the safety of the group. In airsoft people tend to be a bit more pissy about being told something by another (unfamiliar) player, so it would be best if the instructors and the AEX employees who notice unsafe behavior to be on top of it more. During all my live fire classes, including ones taught by Tyler in the past, we’ve gone over the 4 firearm safety rules first thing in the morning.
– Response to this feedback by AEX and Tyler has been positive. The lack of a safety brief in the AM was an oversight, which will be addressed in future classes.
Taking the initiative. Between drills, a few of my guys would go off with me to another area in the facility to practice what we just went through. No one else beyond my group took the initiative to do this.
• Smaller classes. It’s understood that a smaller class would require a higher class fee. A poll for my group showed that people would be willing to pay significantly more for a class of 16 people (4 four man teams) if it meant more content, more practice/repetitions.
– AEX response to this has been concern over getting enough students to fill a class at a higher per student price point. Which is understandable since many airsofters don’t have much coin to spare, especially on training. That said, I’m still of the opinion that those who are willing to spend money on quality content and instruction would be willing to pay a little more for more practice drills and more content within the same amount of time.
• Longer class. Have everyone arrive no later than 7:30am, ready for instruction by 8:15am, 45 minute lunch at most, and have class go till 6pm. Also, a two day class conducted on a Saturday and Sunday would be great.
– AEX response to this is that, if it’s clear that there’s adequate interest for a two day course, that will certainly be looked into down the road.
• Stuff we’d like to see in the next class:
– Quick review and practice of the previous class content.
– Detailed instruction of some of the more advanced techniques he was talking about at the end of the day.
– Show people how to start making the entire process more organic and dynamic once the basics are mastered.

From my Teammate John:

Class room instruction: What I got the most out of this part of the class was the mental attitude that you have to have in order to execute room entry/clearing. Why it’s important to have dominance, speed, violence of action, etc. and how those elements contribute towards imposing your will against those on the other side of the door. I liked how Tyler clarified certain aspects of CQB (like how previously the thought that if you’re good/fast enough you can clear a room w/o anyone getting hurt is in reality not likely). These are all those mental elements I found useful.

Drills and exercises: I liked how Tyler moved in steps. A clear example of this is how he had us do 2 man drills to get that basic movement and coverage into a room. Then once that was established he moved us into 4 man drills with the 3 and 4 man movements completing the overall coverage into a room. I think that’s how all of the instruction should be. Layered on top of basic movements. It seems like there are an infinite amount of scenarios or situations that a team faces entering a room or moving from room to room or hallways, etc. but covering overall concepts and making us understand them is key so that we may problem solve on our own in the future. I think Tyler did a good job covering overall concepts of all the movements we did and hope in the future we get to drill them more.

Safety: Bottom line is if we are learning live fire tactics/concepts and drilling them, then we should also follow live fire rules of safety. I saw a lot of flagging by a surprising number of people. Learning safety seems equally important to the movements we were being taught and we need that added pressure of muzzle safety if we’re going to get anything out of this. Plus out of the entire class I was the only one shot by a friendly, so I’d like that not to happen as much in the future. (Airsoft is a bonus here as airsoft live fire drilling has minimal consequence, but mentally it should be a big deal).

Future instruction: I’d like to see more in depth coverage into what we already learned, sticking with 4 man room clearing but adding drills that include clearing dead space, how to deal with other open doors in a room while clearing, etc. Then linking room to room clearing, and drills for hallways.

Overall I learned alot and enjoyed the experience. I didn’t mind it being a relatively low round count day as long as I learned something new. Besides, I can always try to apply it later … but I need the knowledge first!

From my Teammate Arya:

I started the day without any clue as to what was going to happen. I thought this was going to be a basic, indoor movement and basic weapons manipulation course. I was wrong.

The day started in the classroom, starting with one key lesson; CQB is incredibly complex. We were then given some background, some conceptual theories and after maybe an hour in a classroom we were moving in rooms and eventually put against paper and live targets. Even though this was a elementary lesson in CQB, even the very basic concepts taught were humbling and complex. The only movements we did in detail were 2 man and 4 man room clears and even then only in simple rooms. The responsibilities and what is demanded while in these situations is incredible, you are required to stick to your role even in the face of enemy combatants, trusting that your team will take care of their end as well. The only targets we went up against were paper IPSC targets and at the end, 2 live targets; even the paper targets were formidable enemies. A lot of times, we would enter a room and it was all just a blur, I did what I did … and I think it was right, and I think it was fast (even though I know we were moving way too slow). But every once in a while, we’d hit the room and it all clicked; we stacked up tight, moved quickly, everyone stuck to their roles and we cleared that room in what seemed like less than 2 seconds. I could have done 2 and 4 man clears like that all day and night, and I would have been happy. Just one class and I’m already looking at rooms differently, I’m thinking of how this room would be cleared; when I walked home that night, I stepped into my living room with open, connected kitchen and realized I had no idea how I would clear that room. I just had a full day of instruction, great, detailed, hands-on instruction and all I knew was that I wouldn’t be able to clear my living room. I didn’t leave the class feeling like I knew what I was doing, quite the opposite; I left the class knowing that I knew nothing.

What do I know about room clearing? Last week, I knew what I had seen on TV and video games. A bunch of really badass guys hit a room really fast, stuff happens and because they’re so badass, the good guys generally all come out alive (unless one of the guys was talking about going home to the family, etc… in the previous scene). Well, I learned that all that stuff is BS. Here’s what I learned, CQB is incredibly complex at its most basic stage, the simple room being cleared with 2 or 4 people, and it only gets more complex when the room is less simple and when there is more than just 1 room to clear. I spent the day learning basic 2 and 4 man concepts of room clearing; how to move, where to move, where your sectors are, etc… This stuff is basically elementary CQB material, and I learned that getting this material down is complex and requires way more practice and discipline than I originally thought.

Even though I showed up and trained with people I have been playing airsoft with for years, and even though we mostly only “fought” against paper IPSC targets in this class, I learned that even in the most basic situations CQB is complex and confusing. How complex is it? When you enter a room, are you thinking about which foot goes through the door and how you will transfer that weight to make your turn quickly but in enough control to maneuver around/over/through any potential obstacles? When you reach your point of domination, are you scanning left to right or right to left? Are you supposed to? These thoughts didn’t come into my mind while I was stacked up for my first entry, and quickly came to my mind the instant my body went through the doorway. This is what makes the course material complex, and this is what made this class so captivating.

I spent the majority of the day doing 2 man and 4 man clears of simple rooms against paper targets. I can spend weeks doing the same thing and learn more and more each time. Everyone I talked to came out of this class wanting to do more, wanting to get better at what we did.

Conclusion:
The premise of this event wasn’t to gather a bunch of players and simply duke it out in a CQB arena. It was obvious a few guys had shown up assuming that they’d be there for some Tier 1 gaming (or as they put it “BB gun wars” … *sigh*) and that they’d walk out of the class being as competent as any Tier 1 operator. And they clearly missed the mark. The class was fun, not for the few instances in which we got to shoot at each other, but because of the content that was taught, the way it was taught and the general experience of learning in a subject that we all enjoy.

Let’s be clear, you’re not going to walk out of this class a Tier 1 CQB operator. It takes thousands of hours in training, on the job experience, and pure unadulterated grit which few people on this planet have. This class was simply a taster for how the military conducts CQB operations today. It was very much a Military CQB 101 course. CQB tactics are vast, multi faceted and dynamic. The content covered in this class alone barely even constitutes the tip of the CQB iceberg, but it’s a great start. It’s essential to learn the strict and core rules and techniques to executing effective CQB. Mastery of those methods is required before attempting to bend those rules and becoming more dynamic as would eventually be needed in the thousands of potential scenarios the conventional warfighter is confronted with.

All in all, it was a great class. Some valuable lessons were learned and I know I speak for everyone in my group when I say that we’re eager to learn more and excited about testing out these techniques in our own games.

Special Thanks:
The guys at Airsoft Extreme. For setting up and hosting such a unique event.
Tyler Grey. For sharing just a sampling of the diverse knowledge and experience he’s gained over the years in a topic not often covered nor shared.

09aargroup.jpg

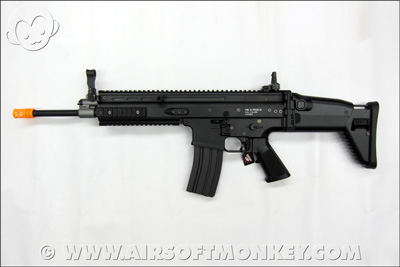
Tokyo Marui – SCAR-H

Manufacturer: Tokyo Marui (Japan)
Type: Recoil AEG (Automatic Electric Gun)
Date Acquired: 03/2012

alt
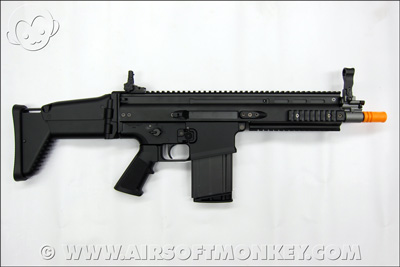
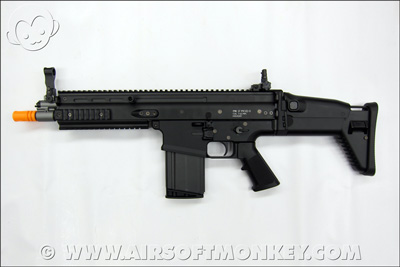
Tokyo Marui – SCAR-H

The Tokyo Marui – SCAR-H is 1 of the latest in their Recoil line of AEG’s. Like the TM SOPMOD and SOCOM series, these AEG’s have a Recoil systems, which give the user a more realistic feel when fired. Since this is the “H” variant of the SCAR, it uses a physically larger magazine to replicate firing the 7.62 NATO round. The magazine is proprietary to the SCAR-H. It comes with both CQC 13″ short length barrel and an extension for 16″ standard barrel. Most other features are identical to the SCAR-L.

alt
Tokyo Marui – SCAR-H

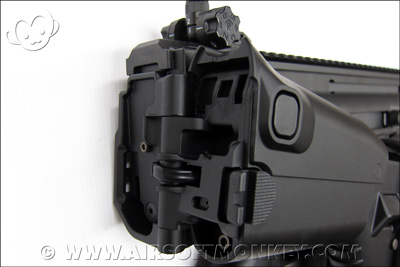
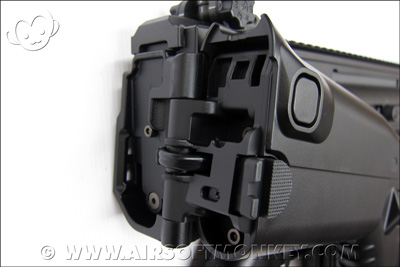
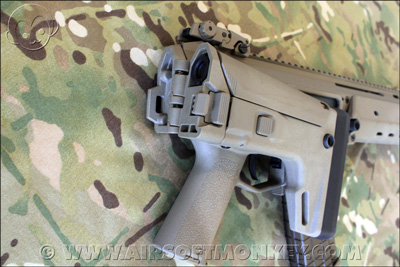
The upper receive is aluminum with a full top Picatinny rail and include folding iron sights. The lower receiver is polymer with ambidexterous selector. The foregrip has rails on both sides and bottom. The rear stock will slide for length adjustment, fold to side and also has an adjustable cheek rest. It takes a standard 8.4v Mini Style battery in the stock.

alt
Tokyo Marui – SCAR-H

Shooting the TM Recoil AEG series is fun. The recoil is strong enough to feel and move the AEG when firing.

Chrono results (FPS)
Green Gas
.20 BB’s
Avg. 300 (This limit is due to Japanese law)

See Travis Haley’s view of airsoft for use in real weapons training using the TM SCAR.
Tokyo Marui – SCAR-L

Manufacturer: Tokyo Marui (Japan)
Type: Recoil AEG (Automatic Electric Gun)
Date Acquired: 03/2012

alt
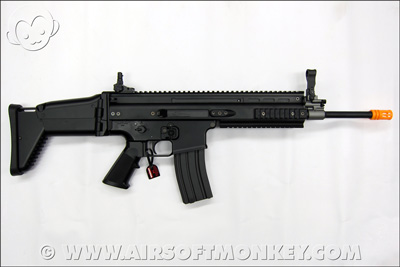
Tokyo Marui – SCAR-L

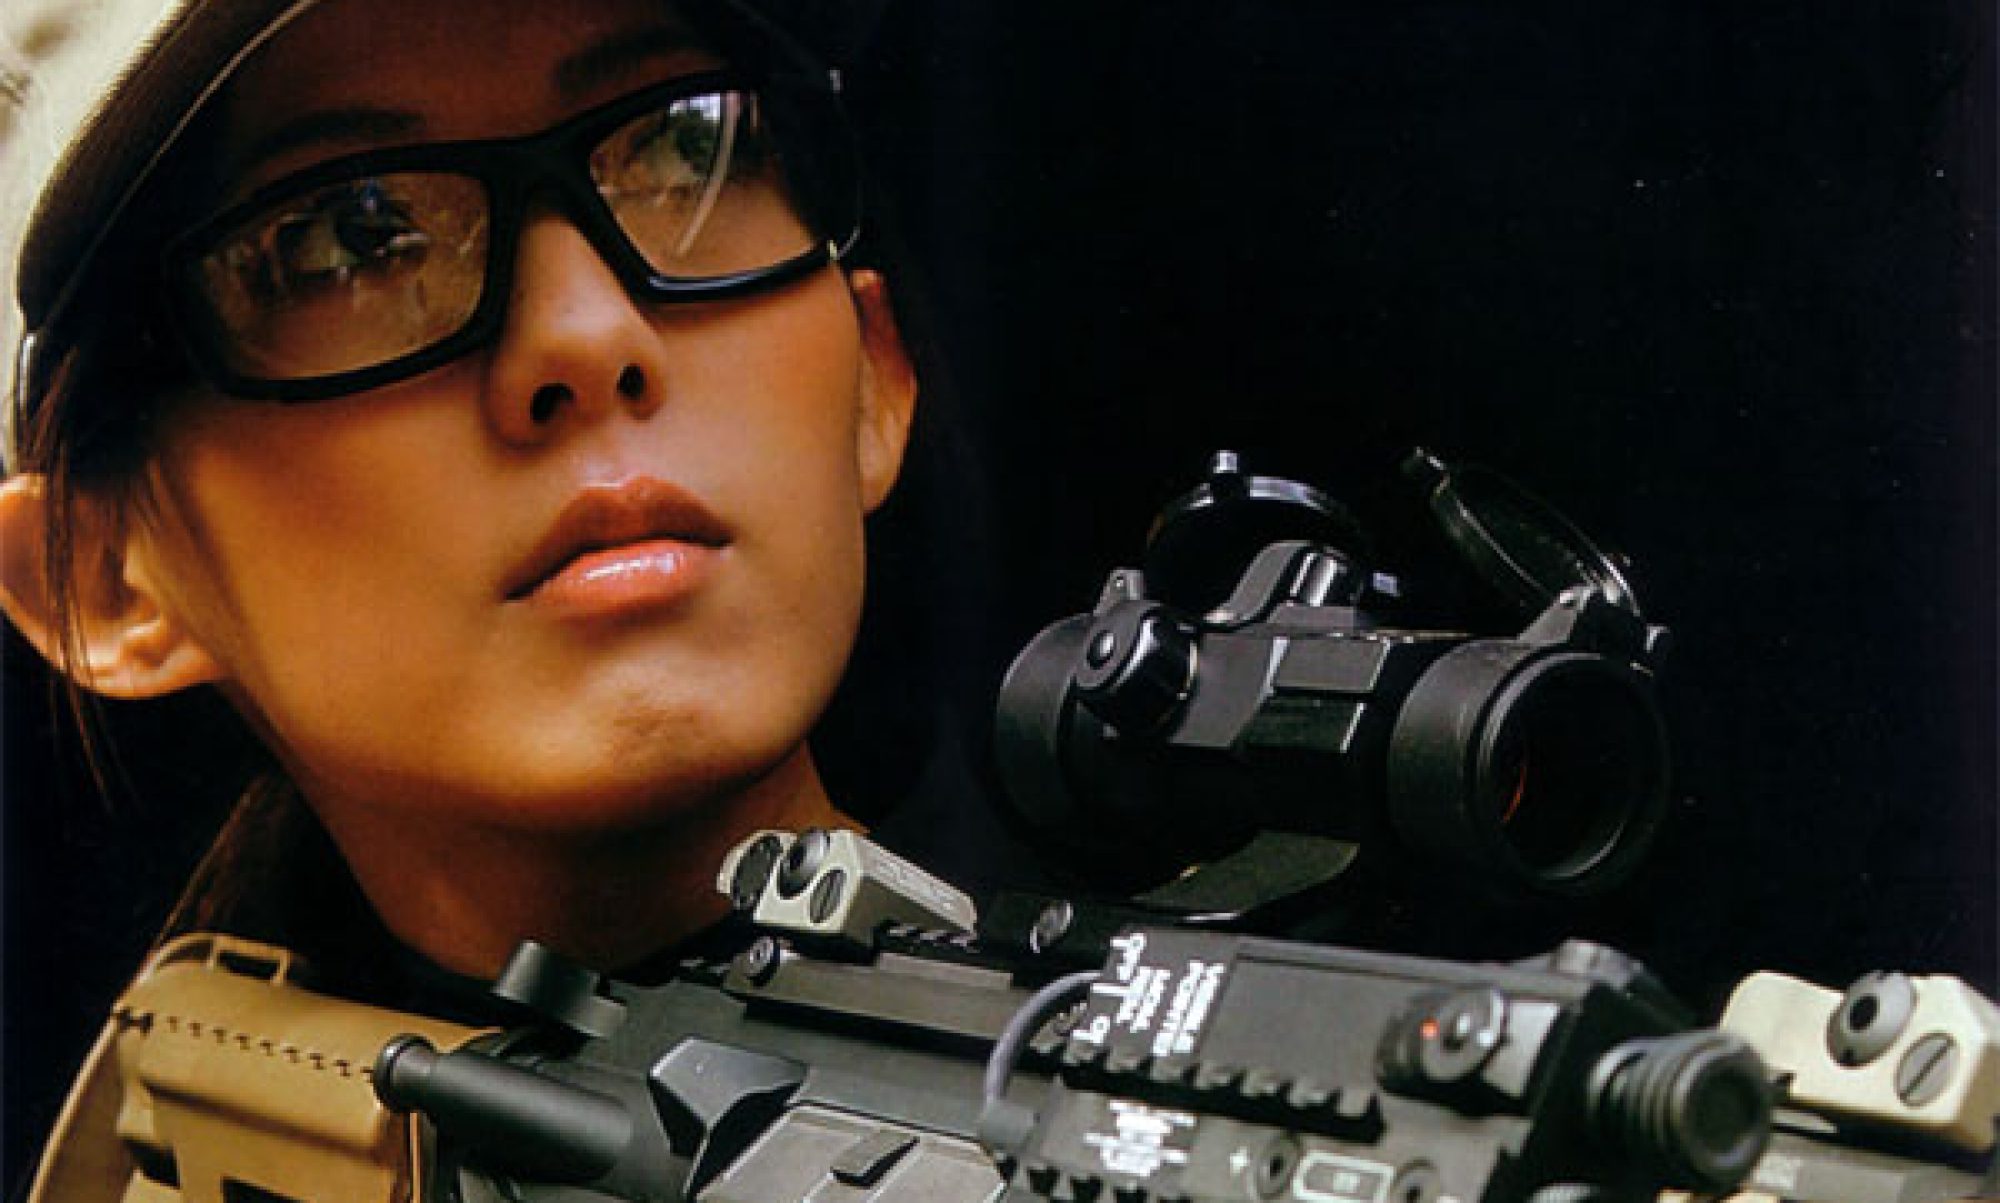
The Tokyo Marui – SCAR-L is 1 of the latest in their Recoil line of AEG’s. Like the TM SOPMOD and SOCOM series, these AEG’s have a Recoil systems, which give the user a more realistic feel when fired. They also use the same type of magazines and the standard 30/82 round ones will stop the AEG from firing when empty which is another realism feature. Freedom Art makes a convertor so you can use older style M4/M16 AEG magazines with this new recoils series as well, but they won’t stop the AEG from firing when empty.

alt
Tokyo Marui – SCAR-L

The upper receive is aluminum with a full top Picatinny rail and include folding iron sights. The lower receiver is polymer with ambidexterous selector. The foregrip has rails on both sides and bottom. The rear stock will slide for length adjustment, fold to side and also has an adjustable cheek rest. It takes a standard 8.4v Mini Style battery in the stock.

alt
Tokyo Marui – SCAR-L

Shooting the TM Recoil AEG series is fun. The recoil is strong enough to feel and move the AEG when firing.

Chrono results (FPS)
Green Gas
.20 BB’s
Avg. 300 (This limit is due to Japanese law)

See Travis Haley’s view of airsoft for use in real weapons training using the TM SCAR.

Element – Surefire M910A Replica

I’ve been looking for a nice M910A replica since the Chinese started cloning them. I bought one that was actually not too bad, but the materials could have been better. That where Element stepped in. I purchased this from weaponblender.com, after trying to track one down on other websites.

Packaging:
The Weapon light comes in a nice box, until you open it only to reveal poor packaging. Im not sure if they all come without some sort of foam insert but mine did not come with any.

img0457u.th.jpg
The shell of the light is made of some really good materials. Reminds me of the polymer used in Pmags.
img0458b.th.jpg
One thing that’s always bothered me about element (or all ACM companies in general) is that a lot of their metal parts come either rusted or paint is already worn on the edges. My rail screws came rusted and my bezel came worn.
img0461y.th.jpg
img0462wd.th.jpg
A few things that are different about the element’s replica is that its an LED version rather than incandescent. Also, this version comes with full trades which is a huge plus (element also makes a version without trades). BUT the color of the battery latch and the bezel are not the correct coloring to the real one. Also, the finish and materials are also not close to the real thing, but still nice none the less. Another nice touch was the rubber covers that cover the navigational lights, no other replica has them.
img0463d.th.jpg
img0464y.th.jpg
Here is it mounted to my TM CQB-R
img0469rs.jpg
Its a bright light, about 200 lumen. Nothing you haven’t seen before in your typical tactical LED light.

Pros:
-The best replica (quality) on the market.
-LED.
-Inexpensive.
-Surefire Trademarks.

Cons:
-Not a perfect replica of the real counterpart.
-Quality of the metal is not the best.

Pro? Con?:
-Pressure switches are not like anything I’ve seen before, so time will show how they hold up.

Feel free to comment with any questions!

Avalon – B&T Rotex III Compact Suppressor

I dont know much about Avalon. Besides that VFC has produced some aegs under Avalon, it still a pretty under the rader company. I’ve been looking for a suppressor, and everything on the market now a days are too plain and too boring. I was on WGC and saw this on the new release page and Instantly knew I had to have it.

Packaging:
rtxpackaging.jpg
suppressor is packaged simply, with silica and instructions.

Intructions:
rtxinst.jpg
The Suppressor:
001xkk.jpg
003nd.jpg
The Suppressor is made beautifully, with trademarks intact. I cannot vouch if they are exactly the same as its real-steel counterpart.
QD mechanism:
005xz.jpg
Two Piece design:
006ry.jpg

006ry.jpg

008rc.jpg
The can is foam filled, along with a spring throughout the can.

Lastly, here I have it attached to my Tokyo Marui CQBR
011gq.jpg
012bhx.jpg
Conclusion:
This suppressor is by far most superior in quality. Ive owned suppressors by Tokyo marui, G&G, G&P, laylax, and Systema. and this one knocks it out of the park. The weight is great, the finish is amazing, clean crisp trades, AND a great price: $54 (before shipping). I hope to see more products from Avalon in the future, and will definitely be considered when purchasing. I cant find a single con about this product. I highly recommend this product to anyone looking for a high quality suppressor. Not for anyone looking for a boring, plain “barrel extension”.

-David

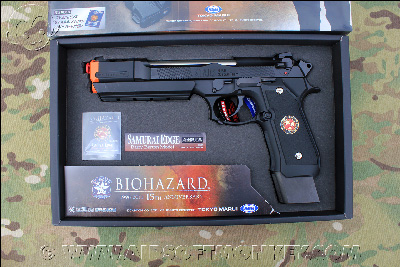
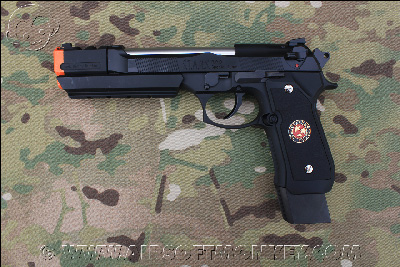
Tokyo Marui – Biohazard Samurai Edge – Barry Burton Model

Manufacturer: Tokyo Marui (Japan)
Type: Gas Blow Back
Date Acquired: 03/2012

alt
Tokyo Marui – Biohazard Samurai Edge – Barry Burton Model

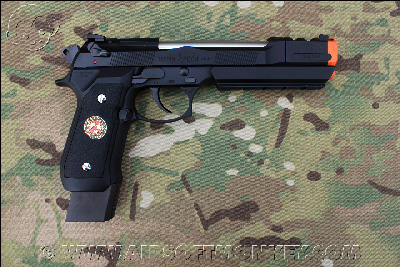
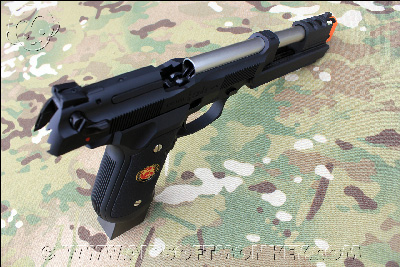
The Tokyo Marui – Biohazard Samurai Edge – Barry Burton Model is a limited edition and celebrates the 15th anniversary of the Biohazard Series. We have reviewed the Samurai Edge Standard Edition already. The Barry Burton Model is based off the Beretta 96F which in real steel is a .40 caliber.

alt
Tokyo Marui – Biohazard Samurai Edge – Barry Burton Model

Features:

  • Custom Slide Engravings
  • Front Compensator
  • Picatinny Rail Mount
  • Long Magazine
  • Combat Sights
  • Stainless Steel Barrel Finish
  • Custom Grips with Emblems
  • Special “Limited 15th Anniversary” Packaging
  • Special Collectible Pin Included

alt alt
Tokyo Marui – Biohazard Samurai Edge – Barry Burton Model

As with most Tokyo Marui GBB Handguns, the external build is mostly plastic. The magazine can handle green gas and this one comes with an extended bumper.

Chrono results (FPS)
Green Gas
.20 BB’s
Avg. 322

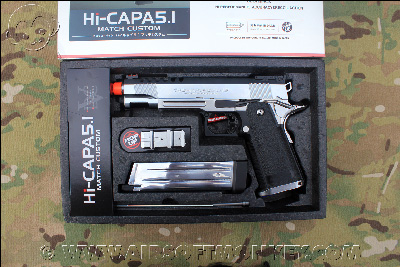
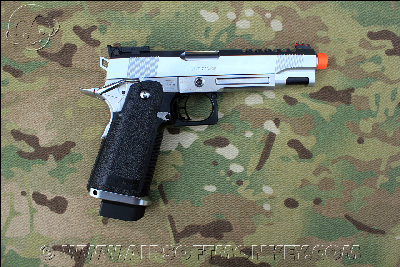
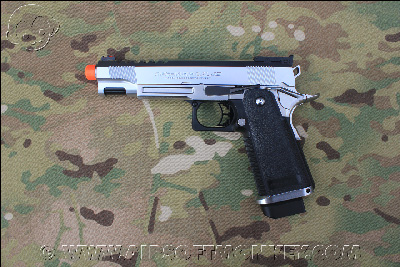
Tokyo Marui – 5.1 Hi Capa Match Custom

Manufacturer: Tokyo Marui (Japan)
Type: Gas Blow Back
Date Acquired: 03/2012

alt
Tokyo Marui – 5.1 Hi Capa Match Custom

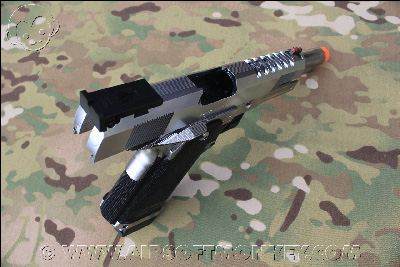
The Tokyo Marui – 5.1 Hi Capa Match Custom is a replica a highly customized IPSC (International Practical Shooting Confederation) style of handgun used in tournament shooting matches. This is based off the Tokyo Marui – 5.1 High Capa but has the following features added:

  • Plastic Slide and Frame have a Polished Hard Chrome Plate look
  • Custom Cuts on Slide
  • Front Fiber Optic Sight
  • Extended Slide Stop
  • Stainless Steel looking Magazine with Bumper
  • Includes grip tape if you want to add to existing grips.
  • Includes optional lower frame rail if you wish to install it

alt
Tokyo Marui – 5.1 Hi Capa Match Custom

Since this is the Hi Capa series, there are a bunch of internal and external replacement and upgrade parts. But it’s nice to see that this version has most customizations, you would have had to purchase separately in the past.

alt alt
Tokyo Marui – 5.1 Hi Capa Match Custom

Chrono results (FPS)
Green Gas
.20 BB’s
Avg. 312

Magpul PTS – AKM Masada

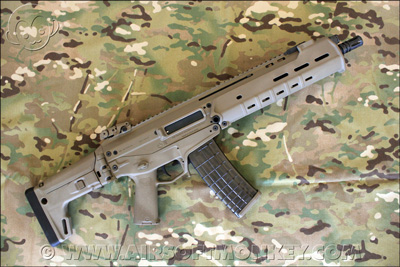
Manufacturer: Magpul PTS (Hong Kong)
Type: AEG

Date Acquired: 03/2012

alt
Magpul PTS – AKM Masada

The Magpul PTS – AKM Masada is basically a ACR Masada with a different lower receiver that accepts AK looking magazines. The AKM Masada ships with upgraded accessories including an 11.5″ Barrel and ACR Multi Folding Stock.

The AKM’s lower receiver is different then the ACR’s in that it takes proprietary 130 round, midcap, AK style magazines. The reason the magazines are proprietary is due to the AKM lower being interchangeable withe the ACR AEG. Hopefully soon, Magpul PTS will sell just the Lower Receivers, so owners of the ACR’s and AKM’s can swap out lowers to their personal preferences. If Magpul PTS designed the AK lower to work with TM Compatible AK Magazines, they would have had to redesign the entire AEG. Functionally there is no advantage running either ACR or AKM lowers. ACR’s can use M4/M16 magazines from other manufacturers though.

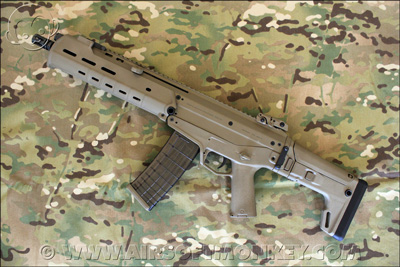
alt
Magpul PTS – AKM Masada

Like the ACR, the AKM version has the quick change barrel and quick change spring system. All major body pins are captured and bolt lock is functional. Batteries are carried in the polymer foregrip and there’s multiple sling and strap attachment points.

alt
Magpul PTS – AKM Masada

The AKM Masada shoots comparably to the ACR. We averaged 378 fps with .20 bb’s
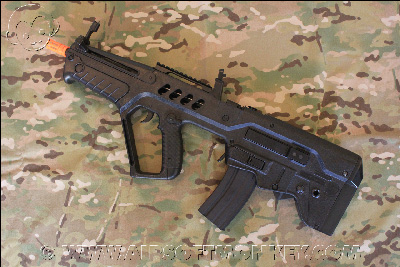
S&T – T21 Explorer

Manufacturer: S&T (Smart Team HK)
Type: AEG


S&T – T21 Explorer

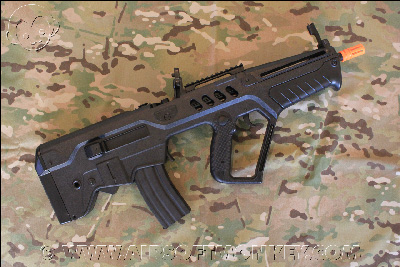
The S&T – T21 Explorer is a replica of the Israeli Military/Weapon Industries Tavor. There are many similarities between the S&T and ARES Tavor AEG’s, but our distributor Spartan Imports, is making sure to state these are made by S&T. While there are some similarities between the 2 brands, the S&T T21 parts diagram shows the differences.
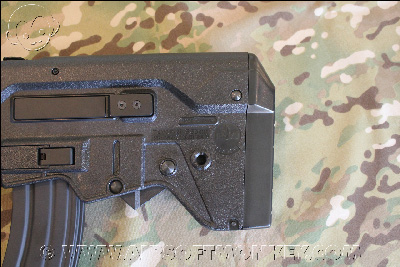
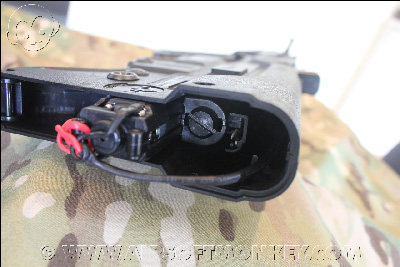
Getting back to the S&T T21 specifically, it’s a Sportline version, meaning it’s a low cost AEG. Externally the plastic body is more smooth and glossy then a military rifle, but all trademarks are in tact and seam lines are acceptable. The rails and cover plates on the top of the AEG are all plastic and “wobble” slightly due to the metal screws and bolts not being tightened down completely. . Flip up BUIS (Backup Iron Sights) are also plastic, and fold away easily. The entire AEG weighs a little more then 5lbs and it comes with a 300 round high capacity magazine. “Bolt” lock functions making it easy to adjust hop-up. The fore grip cover houses the Mini type battery compartment and is easy to access. The screws work with the plastic body to make it rigid. If you feel the AEG’s body flex, in most cases you just need to tighten the screws in a specific area to remedy. Suggest you use “finger tight” pressure and loctite if needed. Will be no fun to strip threads on this AEG.

Internally this AEG does come with a quick change spring system which is easy to get to. The gearbox has a poly carbonate shell but with metal gears inside. Since the lower body is not a clamshell the entire AEG needs to be disassembled to access gearbox, hop-up, inner barrel, etc. If we figure out an easier way to access the any portion of the internal w/o complete disassembly, we’ll post our findings.

We were able to test out various magazines. All fed and sat correctly in the T21. We used the following magazines:

  • S&T – 300 round (Included)
  • Tokyo Marui – 68 round
  • Tokyo Marui – 190 round (Shorty High Cap)
  • Tokyo Marui – 300 round
  • Classic Army – 300 round
  • G&P – 190 round (Shorty High Cap)
  • S-Arms – 160 Round
  • Magpul PTS – 120 round PMAG
  • Magpul PTS – 120 round EMAG

Performance out of the box was good. it shoots straight and hop-up adjustments were responsive and would lock in place.

Chronograph results at around 328 fps with .20 bb’s.

Spartan Imports Video of T21

SHOT Show 2012

DW Staff just returned from SHOT Show 2012! This year, we added a few new contributors to the DW staff!

  • Zak (Bottlelot) Holman – Investigative Journalist / Freelance Videographer zak@onscene.tv. Avid gun shooter for 6 years
  • Iron Horse – OIF veteran, airsoft retailer employee and gun enthusiast.
  • New Aziel – Airsoft and gun store employee and gun enthusiast.
  • Kyle – Gun store employee and Echo 1 Lover.

Join our existing crew:

  • Ning – Professional photographer and Redback One Marketing Director
  • Wedge – Gun store employee, airsofter and avid shooter.
  • uscmCorps – Entertainment industry professional and PTS by Magpul representative.
  • and ORCA

This year we had a large crew able to attend Media Day at the Range. This is the day before SHOT Show, where you can actually shoot many offerings from firearms manufacturers.


DW Crew – Media Day at the Range

Any pictures or video taken outdoors were most likely at Media Day at the Range. Indoor shots or video were taken at SHOT Show. All pictures and videos are being added and updated on airsoftmonkey.com.

http://www.airsoftmonkey.com/content/index.php?option=com_content&view=article&id=456:shot-show-2012&catid=73:airsoftmonkey-info